So you want to typeset LaTeX locally
Nowadays, we have the luxury of ‘cloud LaTeX services’ like Overleaf,
but sometimes you will run into timeout issues because you used a bit too many images.
It will never be a problem if you can just typeset LaTeX locally,
so here’s the setup I use for my purposes.
Note that I need a CJK environment, or more specifically,
I need to be able to typeset Japanese characters.
Environment
macOS Monterey 12.6 (21G115)
TeX Live 2022
IntelliJ IDEA 2022.2.3 (Ultimate Edition (Student License should work as well, haven't tested Community))
Get MacTeX
On macOS, you want to use MacTeX to get TeX Live.
There are many ways you can get MacTeX,
but I used homebrew: brew install --cask mactex
Add TeX support to IntelliJ IDEA
https://www.jetbrains.com/idea/

IntelliJ IDEA – the Leading Java and Kotlin IDE
Yes, IntelliJ IDEA is originally for Java. But if you use Ultimate Edition, then you can use PHP, Ruby and Go, etc. There are more languages (both programming and markup) it can support by installing plugins!
For LaTeX, you will use this:
https://plugins.jetbrains.com/plugin/9473-texify-idea
TeXiFy IDEA - IntelliJ IDEs Plugin | Marketplace
This plugin enables not only syntax highlighting, but also TeX command completion and Run Configuration template for LaTeX! We will use this template to typeset our LaTeX on IDEA.
Setting up Run Configuration
This is where I stumbled a lot.
When typesetting Japanese, latexmk, which is a tool that chain-calls typesetting commands, is the tool to go.
We need to create a config file called latexmkrc.
This can exist either in your home dir or in the project root
with the filename .latexmkrc.
Most sources I searched suggests the following content as our latexmkrc.
#!/usr/bin/env perl
$pdf_mode         = 3;
$latex            = 'platex -halt-on-error';
$latex_silent     = 'platex -halt-on-error -interaction=batchmode';
$bibtex           = 'pbibtex';
$dvipdf           = 'dvipdfmx %O -o %D %S';
$makeindex        = 'mendex %O -o %D %S';
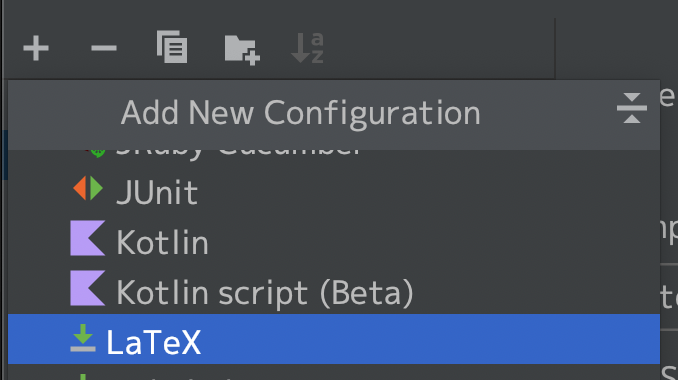
Now that we have the stuff, we look at the Run Configuration.
If the plugin is installed correctly, you should be able to find the LaTeX template.
And this is where stuff gets complicated:
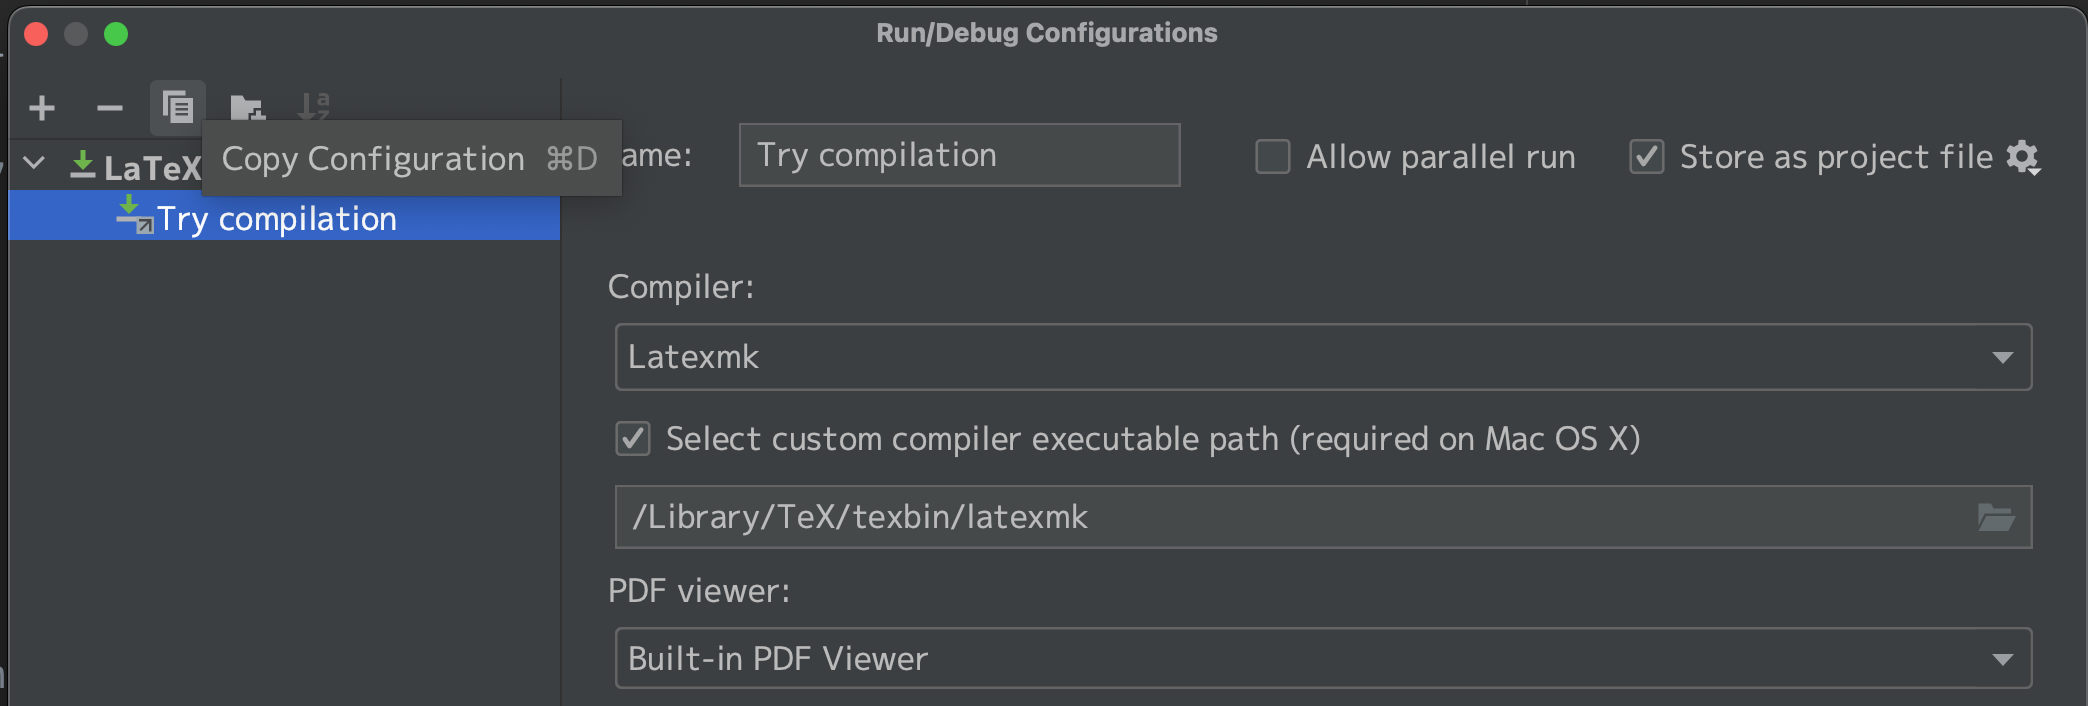
Because of macOS’s security measure, commands installed at specific paths requires user’s explicit path specification.
And latexmk is installed at such a path.
For this reason, simply setting Compiler to Latexmk is not enough.
(…which is the very reason I suffered. I spent like an hour to learn this the hard way)
Usually, latexmk exists here:
/Library/TeX/texbin/latexmk
…or you can use which command and pbcopy the result.
which latexmk | pbcopy
if you didn’t know, pbcopy is a macOS original command which copies output of command to clipboard!
Now you need to enable Select custom compiler executable path (required on Mac OS X) and paste the path!
[BY THE WAY]
PDF Viewer: With the pluginPDF Viewer, you should be able to selectBuilt-in PDF Viewer.
Note, however, that this PDF viewer may fail to render Japanese characters when the PDF file itself contain Japanese character.
To be absolutely sure, you may want to use macOS’s Preview.app.
Scroll down a bit and you will find the following:
| Item | Value |
|---|---|
| Main file to compile | This must be a full-path! (For some reason.) |
| Directory for output files | {projectDir}/output causes the output to go to output directory under the project root. |
| Output format | DEFAULT |
…are the values to set.
I recommend that Directory for output files be set to {projectDir}/output
because LaTeX outputs all sort of files besides PDF (like 10 of them!!)
You probably don’t want your project dir to be cluttered just because you’ve typeset your LaTeX file.
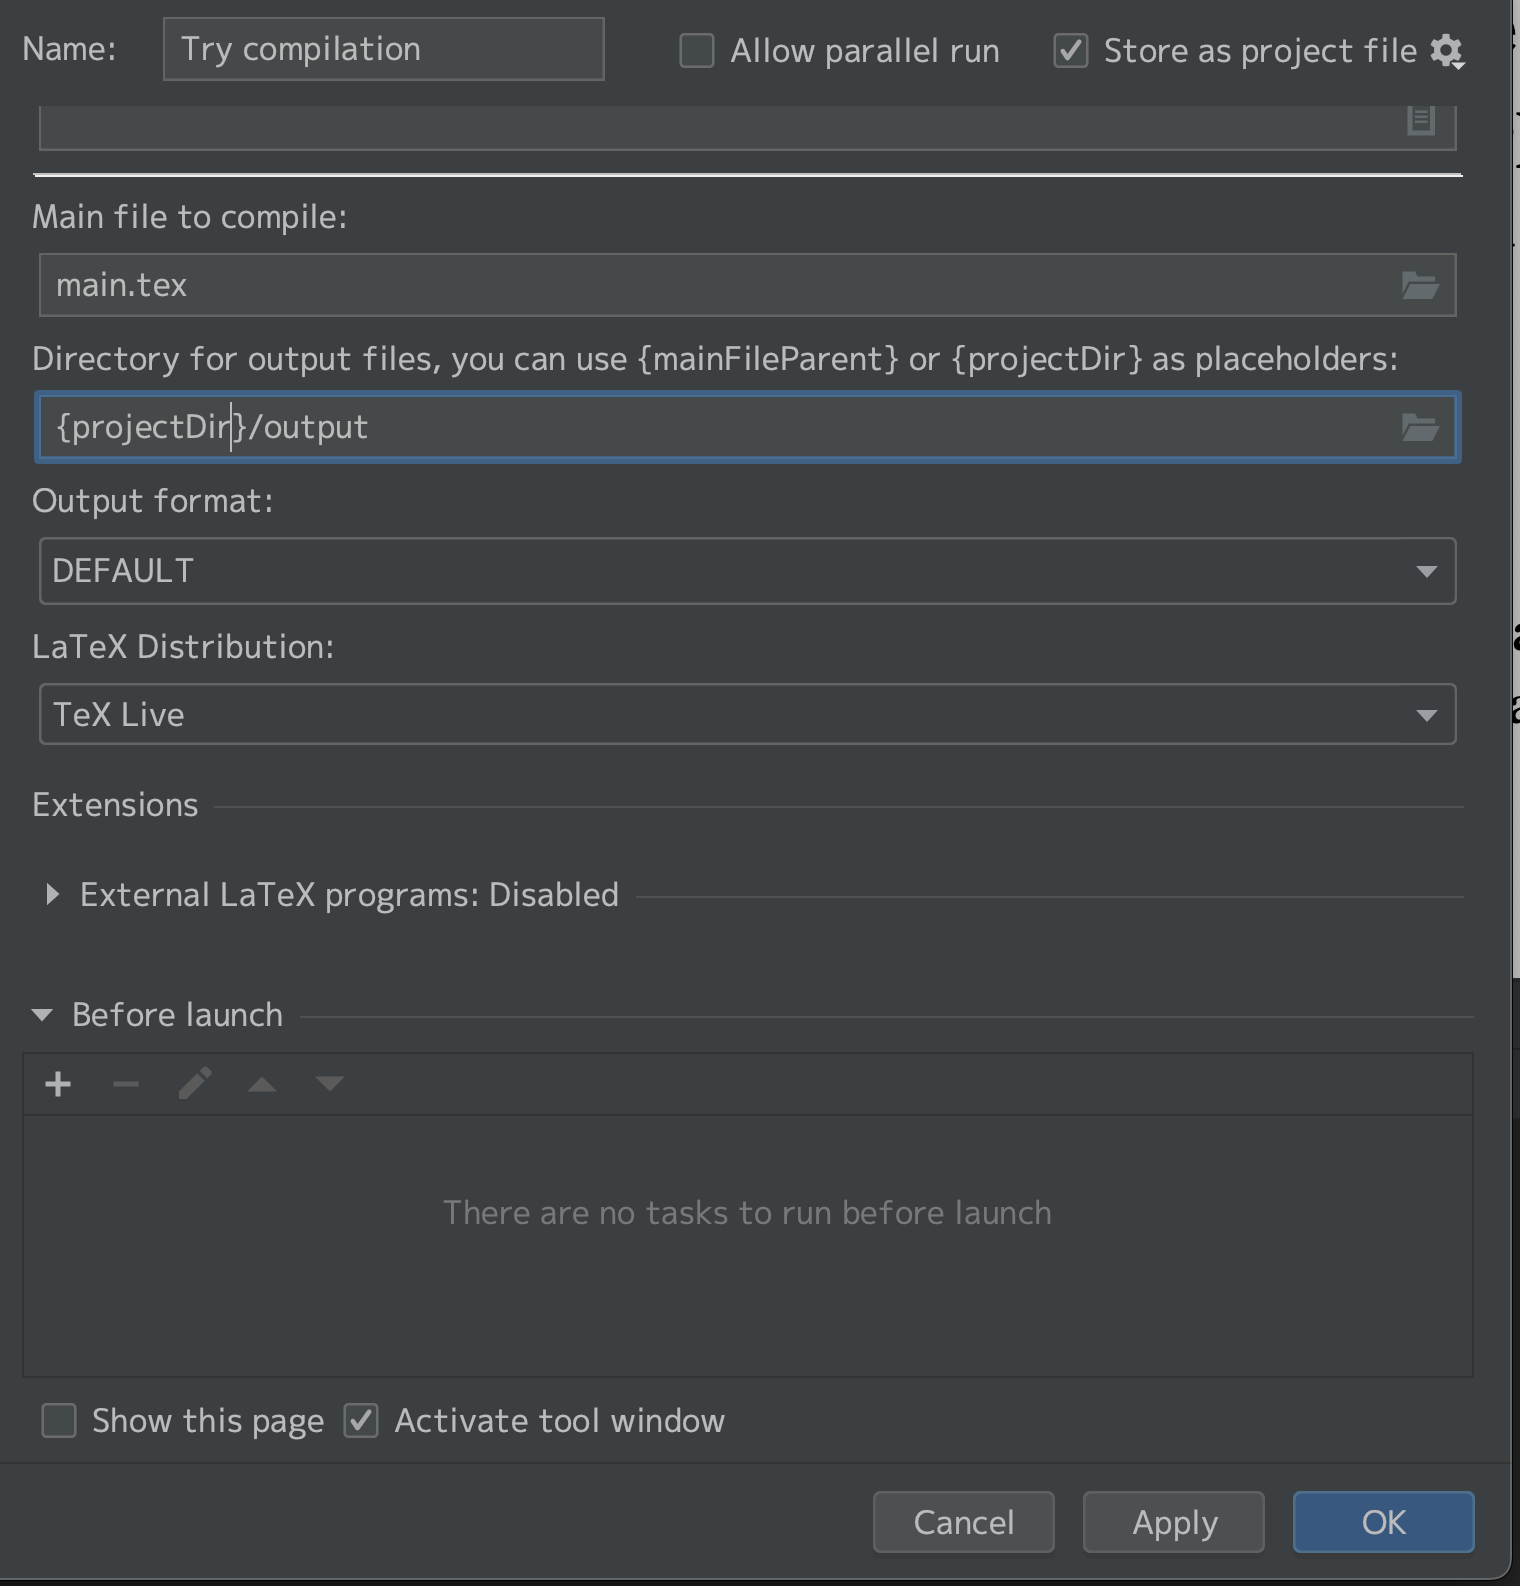
Give an appropriate name to Name:, save by clicking [OK],
And Run (green arrow at the top of the window) to compile the file!

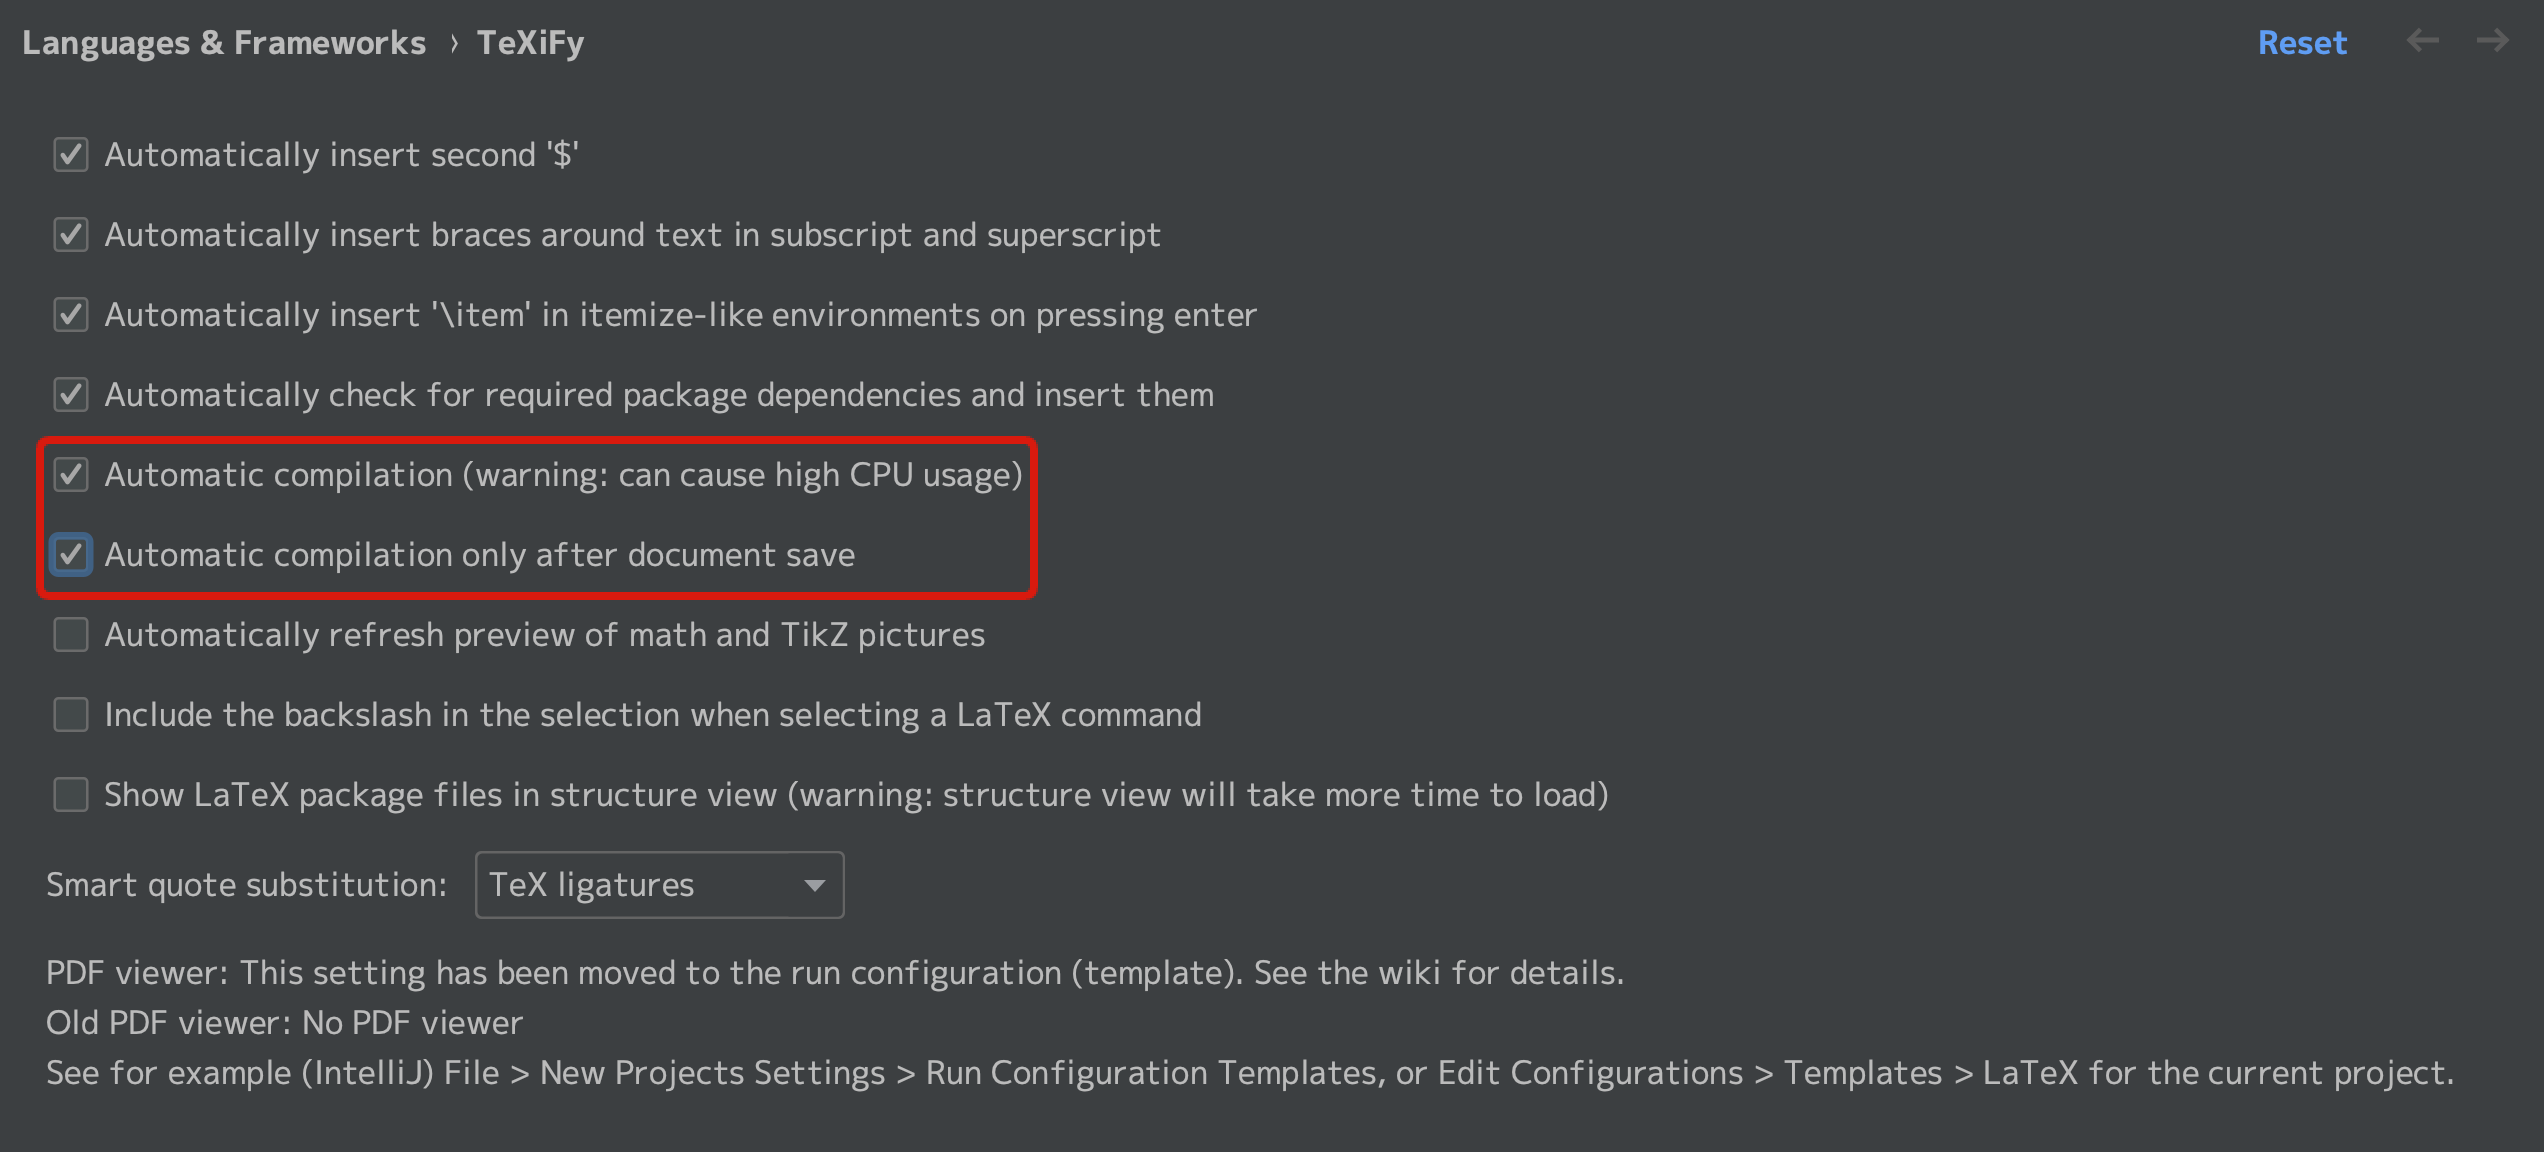
By the way, you can find these settings within the red rectangle at Languages & Frameworks > TeXiFy
in the IDEA preferences.
Checking both of these will initiate compilation every time you save your LaTeX files.
Maybe worth trying if your PC can handle it.